Good Afternoon !
I decided to blog about my stair project today. it has been a long painful process and will finally be finished on Thursday, when the small top and bottom landing will be finished and the trim work done. I will post pictures next week of the finished result.
Ok part of my lake house was built in the 1800's the stairs were a mess, dark brown ugly carpet that went half way across up the wall... YUCK. YUCK and did i say YUCK?
First step was to rip off the carpet. What a mess.... it had lead paint and was full of holes. But i did find some rickety holey hardwood underneath...... a weak 'YAY". fist pump.
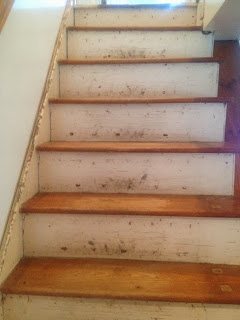
I applied a lead paint stripper, let it sit overnight, then the next morning i painfully scraped away all the lead paint. I filled in every hole on the risers, the treads, the sides, every hole i could find i filled.
I have a confession, I hate Boring stairs.... I want something that stands out. I taped up my own little plastic sheet tent and sanding everything i could.... took hours and lots of mess... but it had to be done !I then primed everything.
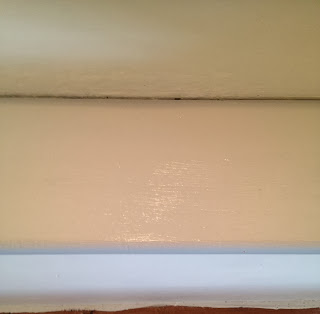
I used Benjamin Moore's Super white in semi-gloss over the side trim, and the risers. For any other trim i swear by, Glidden's High Gloss trim and door paint in a gel form in Super white. BEST trim paint ever!!!
Then i decided to paint the wood treads, they were too damaged and had holes from old banisters years ago. I chose BM in Nantucket gray.
it was looking pretty good but I had to make this stairs pop, so i bought some silver metallic paint and stenciled some shooting stars and Oh do i love how they turned out.
Thanks for taking the time to look and i promise i will post the finished photos next week
Dont be boring be brave, put your own stamp on your home, dare to be brave, get creative and see what happens !
Translate
Tuesday, November 19, 2013
Sunday, October 13, 2013
It has been a very productive week in my household. Finally the dining room floor went in. This was the dining room when we moved in, carpet on the floor and a dark paint on the walls.
We ripped up the carpet, painted the walls a nice bright white, added a crystal ceiling chandelier and my hand hubby built some gorgeous white built in bookshelves. But we have lived on the plywood for a year, it was time to finish this room once and for all!
I picked up some New England wide 8 inch plank unfinished pine from lumbar liquidators. $1.59 a square foot.
It started to go down really nicely, i was getting excited!!! This below is how it looked once all down. I was not finished yet !
I wanted the whitewashed look so I turned to my go to paint. I refuse to live and breath without this stuff...... Annie Sloan Chalk paint !
I decided to make a whitewash. I used the ratio of 50% pure white and 50% water. I would suggest trying some testers on spare planks first..some people like to try a 1/4 of the paint with 3/4 water, which is what i might use for my bedroom floor which is being done today. (another story for another day).
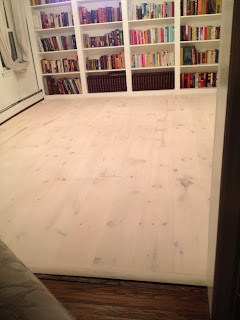
Once happy with my ratio..I mixed it up in a big 5 gallon bucket. I used around half the quart of paint mixed with water for the whole 180 sq. foot floor. . The secret is though I applied with a roller in small sections, let it seep in the wood for 2-3 minutes,then wiped off with a damp rag. The result below!
I let it sit overnight to dry, then the next day I rolled on a coat of water based satin polyurethane, then after 24 hours i applied one more coat and it was done!
I do love the bookcases in a dining room it feels so cozy at night when i have friends and family over for dinner. A nice pumpkin waffle candle lit and it is a great spot to be in. Thanks for taking a peek at my dining room , I enjoyed sharing it with you !
Sunday, October 6, 2013
Lets begin at the beginning...
My very first blog post. You can normally find me here on the back porch of my lake house.
It is where i do all my thinking and my creativity comes alive. The project I am working on this week, is installing unfinished New England wide plank floors that i will whitewash to a few rooms. Each week I will try to show you some before and after pictures of this renovation that seems to be lasting forever!
It is where i do all my thinking and my creativity comes alive. The project I am working on this week, is installing unfinished New England wide plank floors that i will whitewash to a few rooms. Each week I will try to show you some before and after pictures of this renovation that seems to be lasting forever!
Subscribe to:
Posts (Atom)


